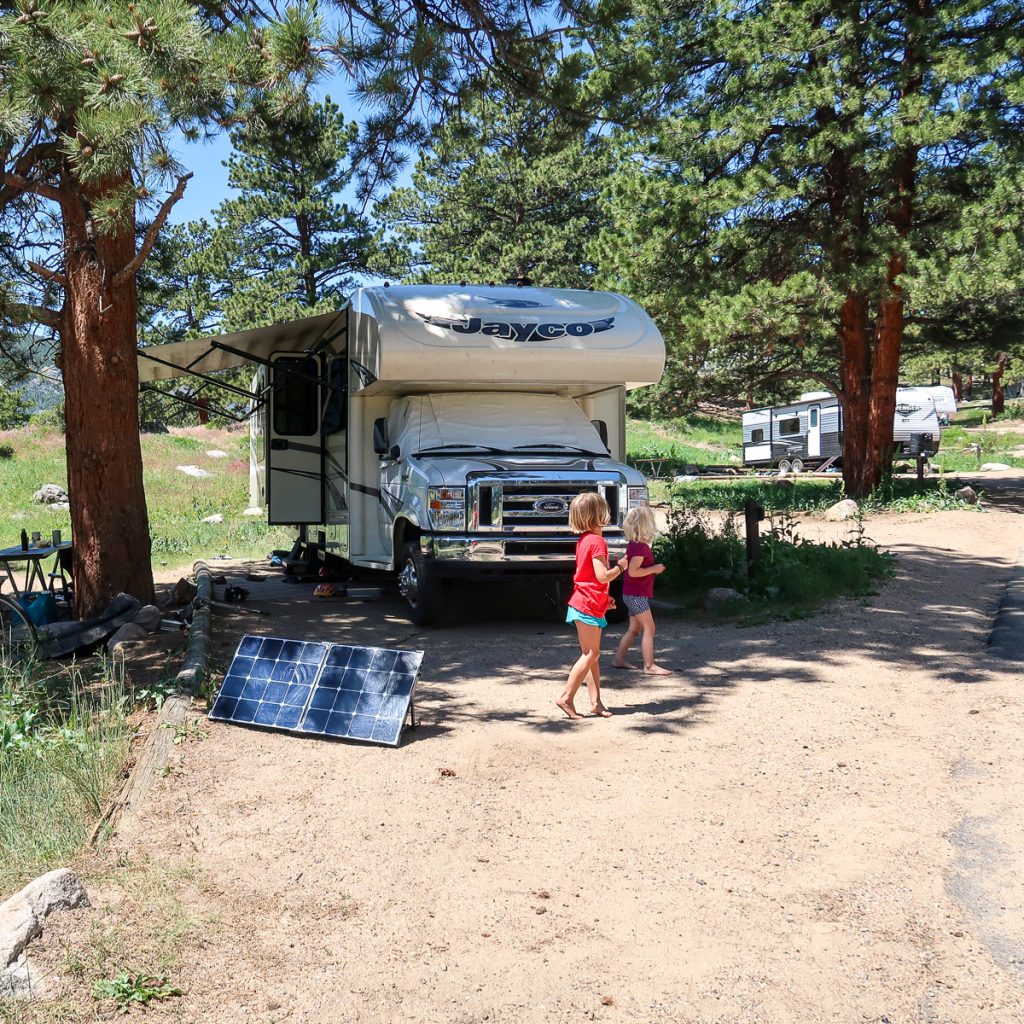
One of the greatest things about RV travel is the ability to go off-grid and totally immerse yourself in nature. The thing is, you will eventually run out of battery power doing so. Many people turn to generators to solve this problem, but generators are noisy and are not even allowed in some areas. You certainly don’t want to be running one 24/7, either.
For this reason, we much prefer the idea of creating a solar powered RV for your boondocking adventures.
The only problem? Many people are intimidated by the idea of putting solar power on RV campers. This is understandable; putting solar power in RV trailers and motorhomes can be a huge, expensive, and technical process. Fortunately, there are ways to make solar powered RVs more accessible to the average joe.
In this article, we will teach you how to run your RV off solar, breaking the process down and simplifying things so you can tackle the project with confidence.
Note: This is a very simplified version of an RV solar power system. There are many things you can do differently to make the system work best for you, but this will get you started.
THIS ARTICLE MAY CONTAIN COMPENSATED LINKS. PLEASE READ OUR DISCLAIMER FOR MORE INFO. THIS POST WAS WRITTEN BY JILL GREISING-MURSCHEL, A FAMILY TRAVEL AND RV LIVING EXPERT.
Don’t have time to read a bunch of RV travel posts and reviews? Here are some of our top picks for RV living:
Our Favorite RV Resources:
- Ultimate RV Living eBook
- Harvest Hosts: (save 15% off your first year and stay overnight at one of the many farms, breweries, and wineries across the country)
- Romely Insurance – (sign up for full timer’s RV insurance and save big)
- Rent An RV With Outdoorsy – (the Airbnb of RVs)
- CampScanner – (Snag reservations at sold-out campgrounds!)
- RV Sheets – (Camping World Queen Short sheets made just for RV mattresses)
- Best Sewer Hose – (popular sewer hose for RVs)
- Best RV Vacuum – (small but mighty vacuum)
- Berkey Water Filters – (the travel Berkey is used by so many RV owners to get clean drinking water)
How to Run Your RV Off Solar: What You Need
First, let’s talk about the RV solar supplies needed to get your off-grid electrical system up and running. Gather these items and you’ll be ready to jump into your solar project.
Solar Panels
First, you will want to grab some solar panels. Many people put a lot of thought into figuring out how many panels to buy based on their electricity usage. Our advice? Skip the complicated math for now and simply get 2–4 panels, depending on what your budget can handle. It’s easy to add more panels down the line.
We recommend this kit from Renogy, as it is incredibly easy to install and get wired into your system.
Charge Controller
Another must-have piece of RV solar equipment is your solar charge controller. Without a charge controller, you can’t really connect your panels to your battery safely. The panels linked above come with a controller, but these components can be bought separately from one another if you prefer.
We recommend an MPPT charge controller over a PWM option because it will be a bit more efficient. However, either one will be fine as long as you get one that can handle the amperage put out by your solar panels.
Batteries
You’ll also need a bank of batteries in order to store the solar power your panels pull in. This may leave you wondering which is the best battery for RV solar.
In our opinion, the best battery for a camper is definitely a LiFePO4 (lithium-ion phosphate) battery. Fortunately, these are becoming more and more affordable as time goes on, and in our experience, even off-brand lithium battery options such as these work just fine.
We like lithium batteries because they are 100% maintenance-free, relatively lightweight, and can be discharged completely without issues. They are also far safer to store in enclosed spaces where there’s little ventilation.
That said, if you need to cut costs somewhere, traditional flooded batteries should work fine, assuming you have the weight capacity and the ability to stay on top of battery maintenance, as well as a safely ventilated place to store them.
Inverter
We also recommend investing in an inverter. As long as you connect your battery bank to your RV, you can use your solar power via your RV’s DC electrical system, which includes your fridge, lights, and vent fans. However, without an inverter, you will not be able to use anything on the AC side of things—meaning the air conditioner, microwave, and power outlets.
There are a couple of options here: You can choose to purchase a large inverter charger (see next paragraph) to take the place of your existing RV converter and wire the new inverter into your RV’s breaker box, or you can choose a smaller portable inverter that you will need to plug things into directly. There are also inverters that do not charge the batteries but can be hardwired into the RV’s system.

We personally chose to install this inverter charger from Sungold, and it is very convenient when it works correctly, as it automatically switches between inverter mode and charger mode when we connect/disconnect shore power. Unfortunately, the inverter broke after only a month of use, meaning we couldn’t use the inverter or charge our batteries for a couple of months while we fought the warranty folks to fix our issue. Because of this, we kind of regretted this choice and don’t necessarily recommend this product.
On top of the troubles we had with our inverter charge, installing such an inverter is a bit more advanced. Therefore, for this article, we will be focusing on using a more basic inverter such as this one.
No matter what inverter you buy, make sure it is a pure sine wave inverter rather than a modified sine wave version. (If you buy a small inverter from, say, AutoZone, chances are it will be modified sine wave and of no use for this application.) You will also need to make sure your batteries can provide enough power to get the inverter running. Three 100 amp hour batteries are just enough to run our 3000-watt inverter.
Related post: 34 RV Must Haves
Breakers and Wires
You will also need some breakers and wires.
These include:
- Battery cables — Bigger is better, so we went with 4/0 gauge wiring for our bank of three 100-amp-hour batteries.
- DC circuit breaker — This goes between the solar panels and the charge controller. Choose the amperage accordingly. If you’re installing the two 100-amp-hour panel kit linked above, this 25-amp breaker will work.
- Manual reset inline fuse/circuit breaker — This goes between the charge controller and the battery. Choose amperage accordingly. If you’re installing the two 100 amp hour panel kit linked above, this 40 amp breaker will work.
- Wiring from the solar panel kit — You might need to add additional 10-gauge wire depending on the length of the runs.
Creating Your Solar Powered RV Setup
Now that you have all of the things you need, the next thing to do is actually install your solar power for RV living. We’ve tried to keep everything simple and provided easy-to-follow instructions below.
Related Post: Pros and Cons of RV Living Full Time
Create Your Battery Bank
The first thing you will need to do is get your battery bank hooked up and ready to go. If possible, choose a place that is near the location of your factory-installed battery in order to make it easy to tie the new bank into the RV’s DC system. Connect the batteries together in parallel using the battery cables mentioned above.
This video will help you do that:
From there, you will just need to connect the battery bank to the RV’s electrical system using the same cables that were used to hook up the old batteries, using the positive post on one end of the bank and the negative post on the opposite end. If this is not possible due to the location of the battery bank, you will need connect the bank to the RV’s fuse panel, which is a bit more complicated.
How to Mount Solar Panels to RV Roof
The next thing you’ll need to do to install solar power for an RV is learn how to mount solar panels to RV roof.
Start by figuring out where you will mount the panels. Clean the area well. Attach the brackets included in the panel kit to the panels using the included screws. Place the panels on the roof—ideally with the brackets resting on top of frame studs—and create pilot holes using a drill. Move the one panel out of the way, put RV roof sealant in each pilot hole, replace the panel, screw the panel onto the roof, and cover the screw and the bottom of the bracket in sealant. You can completely coat the top of the bracket with sealant as well if you want more peace of mind.
Repeat this process with all other panels you install, then give the sealant a day or two to fully cure.
Connecting the Panels to the Charge Controller
Using the included cables, plug the panels into one another using the instructions in the video below. We recommend connecting them in parallel rather than series.
Next, run your solar panel cables into the RV to the place where your charge controller will be mounted (Preferably near the battery bank). Many people will drill a hole in the roof, but we just ran the cable through a gap in our slide seal, using cord covers to keep everything tidy and in place. You could also go through an existing hole in the roof.
Connect wires to the DC breaker, add a wire of the same size to each side of the breaker output, and connect these wires to the charge controller using the instructions included in the kit. Be sure you screw them down tight, but be careful not to overtighten as this can irreparably damage the inserts.
Linking the Charge Controller to the Batteries
Run a 10-gauge wire from the positive output of the charge controller to the inline fuse/breaker and then to the battery bank, connecting the positive to the same positive terminal/post you used to connect to the DC system. Do the same on the negative side but without the breaker in the middle.
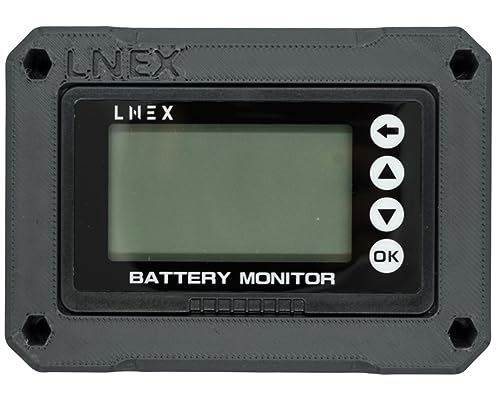
Once this is done, your solar panels should be charging your batteries and you will officially have an RV with solar power. If you wish to be able to monitor your battery charge level, we recommend a battery monitor. We have this one from Renogy and it has served us well.
Adding an Inverter to the Mix
The last step in creating your solar powered camper? Your inverter. As mentioned above, an inverter is not entirely necessary, but it sure does make your solar RV power system more usable, and the GIANDEL product linked above is incredibly easy to hook up and use.
All you have to do is connect the cables from the positive side of the inverter to the main positive post on your battery bank and do the same with the negative.
From there, you can choose to plug anything you need to use directly into the inverter, or you can plug the entire RV into the inverter using a 20-amp adapter. Plugging the RV in will allow you to use your outlets and possibly your microwave (depending on the inverter chosen and your microwave’s wattage). If you have a soft starter installed on your RV air conditioner, you may also be able to use that (though it will drain your battery bank very quickly). Keep in mind, you won’t be able to run everything in the RV at once.
If you prefer an inverter charger, you will need to learn how to hardwire it in. Many RVers seem to like the Victron inverter charger.
There you have it, everything you need to know to create a very basic solar powered RV setup. If you’ve been dreaming of having RV solar, why not order the supplies you need and get started right away? You won’t regret it!